Machine Drawing — NCERT Solutions
CBSE · Class 12 · Engineering Graphics
NCERT Solutions for Machine Drawing, CBSE Class 12 Engineering Graphics: 33 textbook questions solved step by step.
Interactive on Super Tutor
Studying Machine Drawing? Get the full interactive chapter.
Quizzes, flashcards, AI doubt-solver and a step-by-step study plan — built for NCERT solutions and more.
Free trial, no card needed.
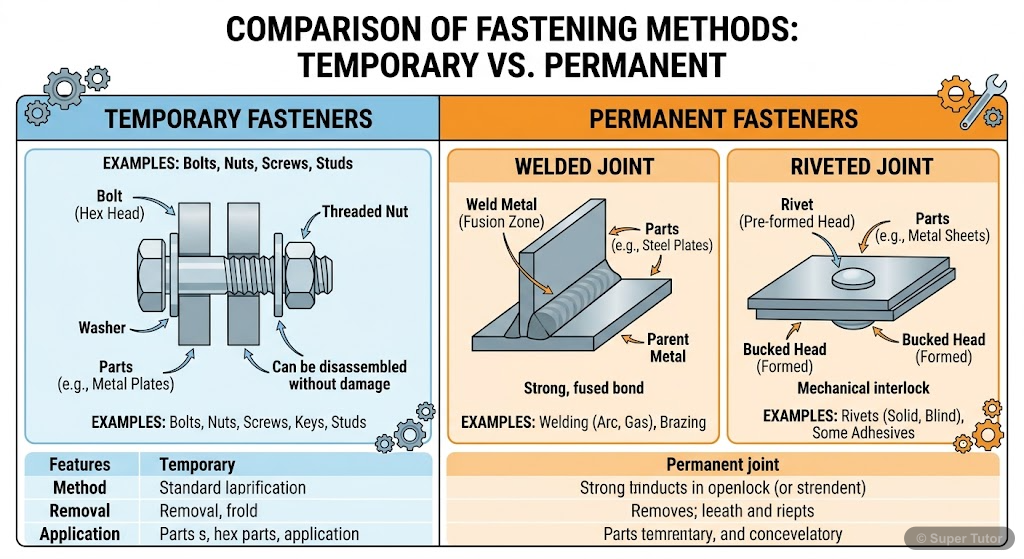
Learn better with visuals Super Tutor pairs illustrations like this with notes and quizzes for Machine Drawing.
Get startedThe first 17 solutions are open to read. The other 16 are free with a Super Tutor account. Unlock all 33 free in Super Tutor
Exercises — Thread Profiles (Drawing of Machine Parts)
1Draw to scale 1:1, the standard profile of BSW thread, taking enlarged pitch as 30 mm. Give standard dimensions.Show solution
Given: Scale 1:1, Pitch P = 30 mm (enlarged), BSW (British Standard Whitworth) thread profile.
Standard proportions of BSW thread:
- Pitch P = 30 mm
- Depth of thread: mm
- Radius at crest and root: mm
- Flank angle: 55° (i.e., included angle = 55°, each side = 27.5° from vertical)
Steps:
- Draw a thin horizontal centre (axis) line.
- Mark pitch divisions of 30 mm along the axis.
- Draw the crest line (outer boundary) and root line (inner boundary) parallel to the axis, separated by the depth mm (half on each side = 9.6 mm from axis).
- Draw the flanks at 27.5° to the vertical (included angle 55°) connecting crest to root.
- Round off the crests and roots with radius mm using a compass.
- Apply hatching and mark all standard dimensions: P = 30 mm, depth = 19.2 mm, r = 4.1 mm, flank angle = 55°.
Final Answer: The BSW thread profile is a V-thread with 55° included angle, rounded crests and roots (r = 0.1373P ≈ 4.1 mm), and depth = 0.6403P ≈ 19.2 mm, drawn to scale 1:1 with P = 30 mm.
Not sure why a step works? check your working in Super Tutor
2Draw to scale 1:1, the standard profile of metric thread (external) taking enlarged pitch as 60 mm. Give standard dimensions.Show solution
Given: Scale 1:1, Pitch P = 60 mm (enlarged), Metric external thread (V-thread, 60° included angle).
Standard proportions of Metric thread:
- Pitch P = 60 mm
- Depth of thread (theoretical): mm
- Actual depth (external): mm
- Crest: flat = mm
- Root: flat = mm (or rounded)
- Flank angle: 30° each side (included angle = 60°)
Steps:
- Draw a thin horizontal centre line (axis).
- Mark pitch divisions of 60 mm along the axis.
- Draw crest line and root line parallel to the axis; total depth = 0.6134P ≈ 36.8 mm.
- Draw flanks at 30° to the vertical on each side (60° included angle).
- Truncate the crest with a flat of P/8 = 7.5 mm and the root with a flat of P/4 = 15 mm.
- Apply hatching and dimension: P = 60 mm, depth ≈ 36.8 mm, crest flat = 7.5 mm, root flat = 15 mm, included angle = 60°.
Final Answer: Metric external thread profile — 60° V-thread, depth ≈ 36.8 mm, crest flat = 7.5 mm, root flat = 15 mm, drawn to scale 1:1 with P = 60 mm.
Not sure why a step works? check your working in Super Tutor
3Draw to scale 1:1, the standard profile of metric thread (internal) taking enlarged pitch as 60 mm. Give standard dimensions.Show solution
Given: Scale 1:1, Pitch P = 60 mm (enlarged), Metric internal thread.
Standard proportions (Metric internal thread):
- Pitch P = 60 mm
- Depth: mm
- Crest (internal = minor diameter side): flat = mm
- Root (internal = major diameter side): flat = mm
- Flank angle: 30° each side (60° included)
Note: For internal thread, the crest and root are interchanged compared to external thread — the crest is at the minor diameter (inside) and the root is at the major diameter.
Steps:
- Draw a thin horizontal centre line.
- Mark pitch divisions of 60 mm.
- Draw the two boundary lines (major and minor diameter) separated by depth ≈ 36.8 mm.
- Draw flanks at 30° to the vertical (60° included angle).
- Crest flat (at minor diameter) = P/4 = 15 mm; Root flat (at major diameter) = P/8 = 7.5 mm.
- Apply hatching and mark all dimensions.
Final Answer: Metric internal thread profile — 60° V-thread, depth ≈ 36.8 mm, crest flat (minor dia side) = 15 mm, root flat (major dia side) = 7.5 mm, drawn to scale 1:1 with P = 60 mm.
Not sure why a step works? check your working in Super Tutor
4Draw to scale 1:1, the standard profile of square thread, taking enlarged pitch as 40 mm. Give standard dimensions.Show solution
Given: Scale 1:1, Pitch P = 40 mm (enlarged), Square thread.
Standard proportions of Square thread:
- Pitch P = 40 mm
- Depth of thread = mm
- Width of thread (crest) = mm
- Width of space (root) = mm
- Flanks are perpendicular to the axis (90° flanks)
Steps:
- Draw a thin horizontal centre line (axis).
- Mark pitch divisions of 40 mm along the axis.
- Draw crest line and root line parallel to the axis, each at a distance of P/2 = 20 mm from the axis (total depth = 20 mm on one side, giving full depth = 20 mm).
- Draw vertical flanks (perpendicular to axis) at every P/2 = 20 mm interval, alternating between crest and root levels, forming perfect squares.
- The thread width = space width = P/2 = 20 mm.
- Apply hatching and dimension: P = 40 mm, depth = 20 mm, thread width = 20 mm.
Final Answer: Square thread profile — rectangular cross-section, depth = P/2 = 20 mm, thread width = space width = P/2 = 20 mm, flanks perpendicular to axis, drawn to scale 1:1 with P = 40 mm.
Not sure why a step works? check your working in Super Tutor
5Draw to scale 1:1, the standard profile of knuckle thread, taking enlarged pitch as 60 mm. Give standard dimensions.Show solution
Given: Scale 1:1, Pitch P = 60 mm (enlarged), Knuckle thread.
Standard proportions of Knuckle thread (from table):
- Pitch P = 60 mm
- Half pitch = 0.5P = 30 mm
- Quarter pitch = 0.25P = 15 mm
- The profile consists of tangential semicircles (rounded crests and roots).
- Depth of thread = 0.5 × (0.5P) = 0.25P = 15 mm
- Radius of each semicircle = 0.25P = 15 mm
Steps:
- Draw a thin horizontal centre line (axis).
- Mark pitch divisions of P = 60 mm along the axis.
- On either side of the centre line, draw rows of tangential semicircles of radius = 0.25P = 15 mm. The semicircles at the crest curve outward and those at the root curve inward, flowing smoothly into one another.
- Ensure free-flowing tangential connection between consecutive semicircles (no sharp corners).
- Apply hatching and mark dimensions: P = 60 mm, 0.5P = 30 mm, 0.25P = 15 mm.
Final Answer: Knuckle thread profile — rounded crests and roots formed by tangential semicircles of radius 0.25P = 15 mm, depth = 0.25P = 15 mm, drawn to scale 1:1 with P = 60 mm.
Not sure why a step works? check your working in Super Tutor
Exercise — Conventional Representation of Threads
1Sketch freehand the conventional representation of internal and external threads, given d = 30 mm.Show solution
Given: Nominal diameter d = 30 mm.
Concept: As per BIS convention, threads are represented by continuous thick and thin lines instead of helical curves.
External Thread Representation:
Front View:
- Draw the axis (centre line — thin chain line).
- Draw two continuous thick lines at distance d = 30 mm apart (representing the crests).
- Draw two continuous thin lines at distance 0.8d = 24 mm apart (representing the roots), inside the thick lines.
- Draw a thick line perpendicular to the axis at the limit of useful thread length.
- In the end view (side view): draw a thick full circle of diameter d = 30 mm (crest) and a thin incomplete (broken) circle of diameter 0.8d = 24 mm (root) — the thin circle is broken (approximately ¾ of the circle is drawn).
Internal Thread Representation (Sectional view of threaded hole):
Front View (section):
- Draw the axis (thin chain line).
- Draw two continuous thick lines at 0.8d = 24 mm apart (crests of internal thread = minor diameter).
- Draw two continuous thin lines at d = 30 mm apart (roots = major diameter).
- Hatching (section lines) are extended up to the thick lines.
- In the end (side) view: draw a thick full circle of diameter 0.8d = 24 mm (crest) and a thin incomplete circle of diameter d = 30 mm (root).
Dimensions to mark: d = 30 mm, 0.8d = 24 mm, thread length as assumed.
Final Answer: Freehand sketches of external thread (thick lines at d = 30 mm, thin lines at 0.8d = 24 mm) and internal thread in section (thick lines at 0.8d = 24 mm, thin lines at d = 30 mm, hatching up to thick lines) are drawn as per BIS convention.
Not sure why a step works? check your working in Super Tutor
Exercises — Bolts (Hexagonal, Square, Tee Head, Hook Bolt)
1Draw to scale 1:1, the Front view and Side view of a hexagonal head bolt of diameter 30 mm, keeping the axis parallel to H.P and V.P. The two opposite sides of the hexagonal head is parallel to V.P. The length of the bolt is 120 mm.Show solution
Given: d = 30 mm, Length L = 120 mm, axis parallel to both H.P. and V.P., two opposite sides of hexagonal head parallel to V.P., Scale 1:1.
Standard Dimensions (Hexagonal Head Bolt):
Steps — Front View (axis horizontal, two flats parallel to VP → two flats seen in front view):
- Draw the axis as a horizontal centre line.
- Draw the shank: two thick lines at distance d = 30 mm apart, length = L − head length = 120 − 21 = 99 mm from the head face.
- Show threaded portion (last 2d = 60 mm): thick lines at d = 30 mm (crest), thin lines at 0.8d = 24 mm (root).
- Draw the hexagonal head (two flats visible): a rectangle of width = across flats = 48 mm and height = 21 mm. Show chamfer arcs on top corners.
- Draw chamfer arc on the head using radius = across corners/2 ≈ 27.7 mm.
Steps — Side View (end view of head):
- Draw the hexagon with across-flats = 48 mm (two sides parallel to VP means in side view the hexagon appears with a vertex pointing toward viewer — across corners view).
- Show the chamfering circle (inscribed circle of chamfer) touching mid-points of all six sides.
- Show the shank as a circle of diameter d = 30 mm and root circle of 0.8d = 24 mm (broken).
Final Answer: Front view shows rectangular shank with threaded end and hexagonal head (two flats visible, chamfer arcs shown); Side view shows hexagon (across flats = 48 mm) with chamfer circle. All dimensions marked: d = 30, L = 120, head height = 21, threaded length = 60 mm.
Not sure why a step works? check your working in Super Tutor
2Draw to scale 1:1, the Front view and Top view of a hexagonal headed bolt of diameter 20 mm, keeping the axis perpendicular to V.P. Give standard dimensions.Show solution
Given: d = 20 mm, axis perpendicular to V.P. (axis is horizontal, pointing toward/away from VP — i.e., axis along the depth direction), Scale 1:1.
Standard Dimensions:
Steps — Front View (axis perpendicular to VP → front view shows end/circular view of bolt):
- Draw centre lines (horizontal and vertical).
- Draw a circle of diameter d = 20 mm (shank/crest) — thick circle.
- Draw a broken circle of diameter 0.8d = 16 mm (root of thread) — thin broken circle.
- Draw the hexagon circumscribed about the circle of across-flats = 33 mm (two sides horizontal or as specified).
- Draw the chamfering circle touching mid-points of all six sides.
Steps — Top View (plan, axis horizontal going into VP):
- Project from front view.
- Draw the shank as two horizontal lines d = 20 mm apart.
- Show threaded portion: thick lines at 20 mm, thin lines at 16 mm.
- Draw the head as a rectangle: width = across flats = 33 mm, length = head height = 14 mm.
- Show chamfer arc on the visible face of the head.
Final Answer: Front view shows hexagonal end view with concentric circles (d = 20 mm thick, 0.8d = 16 mm thin broken) and hexagon (across flats = 33 mm). Top view shows shank with threaded end and rectangular head. All standard dimensions marked.
Not sure why a step works? check your working in Super Tutor
3Draw to scale 1:1, the Front view and Side view of a hexagonal headed bolt of diameter 24 mm, keeping the axis parallel to V.P and H.P. Two opposite sides of the hexagonal head is perpendicular to V.P. Take: Length of the bolt = 120 mm, Threaded length of the bolt = 80 mm.Show solution
Given: d = 24 mm, L = 120 mm, Threaded length = 80 mm, axis parallel to both VP and HP, two opposite sides of hexagonal head perpendicular to VP, Scale 1:1.
Standard Dimensions:
Steps — Front View (axis horizontal; two sides perpendicular to VP → one vertex points toward viewer in side view; in front view, a vertex is seen at top and bottom of head):
- Draw horizontal axis (centre line).
- Draw shank: two thick lines 24 mm apart, total length 120 mm.
- Show threaded portion (80 mm from tip): thick lines at d = 24 mm, thin lines at 0.8d = 19.2 mm.
- Draw hexagonal head: since two sides are perpendicular to VP, in the front view the head appears with a corner (vertex) at top and bottom. Width = across corners ≈ 45 mm, height = head height = 17 mm. Draw the outline showing two slanted sides and one vertical side on each half.
- Show chamfer arc on the head.
Steps — Side View:
- Project from front view.
- Show hexagon with across-flats = 39 mm (two sides now parallel to VP in side view).
- Show chamfer circle.
- Show shank circle d = 24 mm (thick) and root circle 0.8d = 19.2 mm (thin broken).
Final Answer: Front view shows bolt with shank (L = 120 mm), threaded length = 80 mm, and hexagonal head with vertex at top/bottom (across corners ≈ 45 mm, height = 17 mm). Side view shows hexagon across flats = 39 mm. All dimensions marked.
Not sure why a step works? check your working in Super Tutor
4Draw to scale full size, the Front view and Side view of a square head bolt of diameter 24 mm, keeping its axis horizontal.Show solution
Given: d = 24 mm, axis horizontal (parallel to HP and VP), Scale 1:1 (full size).
Standard Dimensions (Square Head Bolt):
Steps — Front View (axis horizontal, two faces of square head parallel to VP):
- Draw horizontal centre line (axis).
- Draw shank: two thick lines 24 mm apart.
- Show threaded portion (48 mm from tip): thick lines at 24 mm, thin lines at 19.2 mm.
- Draw square head: rectangle of width = 1.5d = 36 mm and height = 0.7d = 17 mm. Show chamfer (45°) on the top corners.
- Draw chamfer arc on the head face.
Steps — Side View (end view of head):
- Draw a square of side 1.5d = 36 mm.
- Draw the chamfering circle (inscribed circle) of diameter = 36 mm touching all four sides.
- Show shank circle d = 24 mm (thick) and root circle 0.8d = 19.2 mm (thin broken).
Final Answer: Front view shows rectangular shank with threaded end and square head (36 mm × 17 mm, chamfered corners). Side view shows square (36 mm side) with inscribed chamfer circle. All dimensions marked.
Not sure why a step works? check your working in Super Tutor
5Draw to scale 1:1, the Elevation and Plan of a square head bolt of diameter 30 mm, when its axis is perpendicular to H.P. Give standard dimensions.Show solution
Given: d = 30 mm, axis perpendicular to HP (axis vertical), Scale 1:1.
Standard Dimensions:
Steps — Plan (Top View, axis vertical → plan shows end view of bolt):
- Draw centre lines.
- Draw circle of diameter d = 30 mm (shank crest) — thick.
- Draw broken circle of diameter 0.8d = 24 mm (root) — thin broken.
- Draw square of side 1.5d = 45 mm around the circles (head in plan).
- Draw chamfering circle (diameter = 45 mm, inscribed in square) — this is the chamfer circle touching mid-points of all four sides.
Steps — Elevation (Front View, axis vertical):
- Project from plan.
- Draw the shank as two vertical thick lines 30 mm apart.
- Show threaded portion (60 mm from tip): thick lines at 30 mm, thin lines at 24 mm.
- Draw square head: rectangle of width = 45 mm, height = 21 mm at the top.
- Show chamfer (45°) on top corners of the head.
Final Answer: Plan shows square (45 mm side) with inscribed chamfer circle and shank circles (d = 30 mm thick, 0.8d = 24 mm thin broken). Elevation shows vertical shank with threaded end and square head (45 mm wide, 21 mm high, chamfered). All dimensions marked.
Not sure why a step works? check your working in Super Tutor
6Draw to scale 1:1, the Front elevation and Plan of a tee head bolt of diameter 24 mm, keeping the axis perpendicular to H.P.Show solution
Given: d = 24 mm, axis perpendicular to HP (vertical), Scale 1:1.
Standard Dimensions (Tee Head Bolt):
Steps — Plan (Top View):
- Draw centre lines.
- Draw the T-shaped head in plan: a rectangle of 3d × 0.7d = 72 mm × 17 mm (the cross of the T) and a rectangle of 1.5d × 0.5d = 36 mm × 12 mm (the stem of the T).
- Draw shank circle d = 24 mm (thick) and root circle 0.8d = 19.2 mm (thin broken) at centre.
Steps — Front Elevation (axis vertical):
- Project from plan.
- Draw shank as two vertical thick lines 24 mm apart.
- Show threaded portion (48 mm from tip): thick lines at 24 mm, thin lines at 19.2 mm.
- Draw T-shaped head at top: wide flange (72 mm wide, 17 mm high) with a narrower neck (36 mm wide, 12 mm high) below the flange.
- Dimension all parts.
Final Answer: Front elevation shows vertical shank with threaded end and T-shaped head (flange 72 mm wide, 17 mm high; neck 36 mm wide, 12 mm high). Plan shows T-shape with shank circles. All dimensions marked.
Not sure why a step works? check your working in Super Tutor
7Draw to scale 1:1, the Front view and Side view of a hook bolt with diameter 25 mm, when its axis is parallel to V.P and H.P. Give standard dimensions.Show solution
Given: d = 25 mm, axis parallel to both VP and HP (horizontal), Scale 1:1.
Standard Dimensions (Hook Bolt / J-Bolt):
Steps — Front View (axis horizontal):
- Draw horizontal centre line (axis).
- Draw the straight shank portion: two thick lines d = 25 mm apart.
- Show threaded portion (2d = 50 mm from the threaded end): thick lines at 25 mm, thin lines at 20 mm.
- At the other end, draw the hook (J-shape): a semicircle of outer radius = d = 25 mm curving downward (or upward), with the hook end returning parallel to the shank.
- The hook cross-section is circular (diameter = d = 25 mm).
Steps — Side View (Top View / Plan):
- Draw centre lines.
- Draw outer circle of diameter d = 25 mm (shank cross-section) — thick.
- Draw broken circle of diameter 0.8d = 20 mm (root of thread) — thin broken.
- Show the hook in plan as a semicircular arc.
- Mark thin cross lines on the head portion to indicate the circular cross-section.
Final Answer: Front view shows horizontal shank with threaded end and J-shaped hook at the other end (hook radius = d = 25 mm). Side/top view shows circular shank (d = 25 mm thick, 0.8d = 20 mm thin broken) and hook arc. All standard dimensions marked.
Not sure why a step works? check your working in Super Tutor
Exercises — Nuts (Hexagonal and Square)
1Draw to scale 1:1, the front elevation and plan of a hexagonal nut keeping axis vertical, when two of the opposite sides of the hexagon are parallel to V.P. Give standard dimensions, taking the diameter of bolt = 24 mm.Show solution
Given: d = 24 mm, axis vertical (perpendicular to HP), two opposite sides of hexagon parallel to VP, Scale 1:1.
Standard Dimensions (Hexagonal Nut):
Steps — Plan (Top View, axis vertical):
- Draw centre lines.
- Draw chamfering circle of diameter = across flats = 39 mm.
- Circumscribe a regular hexagon about this circle with two sides horizontal (parallel to VP means in plan two sides are horizontal).
- Draw a thick circle of diameter 0.8d = 19.2 mm (crest of internal thread — minor diameter) — shown as full thick circle.
- Draw a thin broken circle of diameter d = 24 mm (root — major diameter).
Steps — Front Elevation (axis vertical):
- Project from plan.
- Two opposite sides are parallel to VP → in front elevation, two flat faces are seen (rectangle view).
- Draw the nut outline: width = across flats = 39 mm, height = 0.8d = 19.2 mm.
- Show chamfer arcs on the top two corners (chamfer angle 30°). The chamfer arc is drawn using radius = across corners/2 ≈ 22.5 mm.
- Show the threaded hole: thick lines at 0.8d = 19.2 mm apart (crest), thin lines at d = 24 mm apart (root) — since it is a sectional or conventional representation.
Final Answer: Plan shows hexagon (across flats = 39 mm, two sides horizontal) with thick circle (0.8d = 19.2 mm) and thin broken circle (d = 24 mm). Front elevation shows rectangle (39 mm wide, 19.2 mm high) with chamfer arcs on top corners. All dimensions marked.
Not sure why a step works? check your working in Super Tutor
2Draw to scale 1:1, the Plan and Front View of a hexagonal nut, taking nominal diameter of the bolt = 30 mm, keeping the axis perpendicular to H.P and two opposite sides of the hexagon perpendicular to V.P. Give standard dimensions.Show solution
Given: d = 30 mm, axis perpendicular to HP (vertical), two opposite sides of hexagon perpendicular to VP, Scale 1:1.
Standard Dimensions:
Steps — Plan (Top View):
- Draw centre lines.
- Draw chamfering circle (diameter = across flats = 48 mm).
- Circumscribe hexagon with two sides perpendicular to VP (i.e., two sides are vertical in plan — two sides parallel to the left-right direction).
- Draw thick circle d = 0.8×30 = 24 mm (minor diameter/crest of internal thread).
- Draw thin broken circle d = 30 mm (major diameter/root).
Steps — Front View:
- Project from plan.
- Two sides perpendicular to VP → in front view, a corner (vertex) of the hexagon faces the viewer — across corners view.
- Width of front view = across corners ≈ 55.4 mm, height = nut height = 24 mm.
- Draw the outline showing two slanted sides meeting at a top vertex and two slanted sides at bottom, with vertical sides at the extreme left and right.
- Show chamfer arc on top.
- Show threaded hole conventionally.
Final Answer: Plan shows hexagon (across flats = 48 mm, two sides vertical) with concentric circles. Front view shows hexagon in across-corners orientation (width ≈ 55.4 mm, height = 24 mm) with chamfer arc. All dimensions marked.
Not sure why a step works? check your working in Super Tutor
3Draw to scale 1:1, the Front View and Top View of a square nut, taking nominal diameter = 30 mm, keeping the axis perpendicular to H.P and two opposite sides of the square perpendicular to V.P. Give standard dimensions.Show solution
Given: d = 30 mm, axis perpendicular to HP (vertical), two opposite sides of square perpendicular to VP, Scale 1:1.
Standard Dimensions (Square Nut):
Steps — Top View (Plan):
- Draw centre lines.
- Draw chamfering circle of diameter = side of square = 45 mm (inscribed circle).
- Draw square of side 45 mm with two sides perpendicular to VP (i.e., two sides are vertical in plan).
- Draw thick circle of diameter 0.8d = 24 mm (crest of internal thread).
- Draw thin broken circle of diameter d = 30 mm (root).
Steps — Front View:
- Project from plan.
- Two sides perpendicular to VP → in front view, two flat faces are seen (rectangle).
- Width = side of square = 45 mm, height = nut height = 24 mm.
- Show chamfer (45°) on the top two corners.
- Show threaded hole: thick lines at 0.8d = 24 mm, thin lines at d = 30 mm.
Final Answer: Top view shows square (45 mm side, two sides vertical) with inscribed chamfer circle and concentric thread circles. Front view shows rectangle (45 mm × 24 mm) with 45° chamfered top corners. All dimensions marked.
Not sure why a step works? check your working in Super Tutor
4Draw to scale 1:1, the front view and plan of a square nut, taking d = 30 mm, keeping the axis perpendicular to H.P and the diagonal of the square face parallel to V.P. Give standard dimensions.Show solution
Given: d = 30 mm, axis perpendicular to HP (vertical), diagonal of square face parallel to VP, Scale 1:1.
Standard Dimensions:
Steps — Plan (Top View):
- Draw centre lines.
- Draw the square of side 45 mm rotated 45° so that the diagonal is parallel to VP (i.e., one corner points toward VP — the square appears as a diamond shape in plan).
- Draw chamfering circle (diameter = 45 mm, inscribed in square).
- Draw thick circle 0.8d = 24 mm and thin broken circle d = 30 mm.
Steps — Front View:
- Project from plan.
- Diagonal parallel to VP → in front view, a corner (vertex) faces the viewer on left and right.
- Width of front view = diagonal = 45√2 ≈ 63.6 mm, height = 24 mm.
- The outline shows a pointed/diamond shape: two slanted lines meeting at a point on each side.
- Show chamfer arc on top.
- Show threaded hole conventionally.
Final Answer: Plan shows square (45 mm side) rotated 45° (diamond orientation) with inscribed chamfer circle and thread circles. Front view shows diamond-shaped outline (width ≈ 63.6 mm, height = 24 mm) with chamfer arc. All dimensions marked.
Not sure why a step works? check your working in Super Tutor
Exercises — Assembly of Bolt, Nut and Washer
Free with a Super Tutor account
Free with a Super Tutor account
Free with a Super Tutor account
Exercises — Studs
Free with a Super Tutor account
Free with a Super Tutor account
Free with a Super Tutor account
Exercises — Machine Screws
Free with a Super Tutor account
Free with a Super Tutor account
Free with a Super Tutor account
Free with a Super Tutor account
Free with a Super Tutor account
Exercises — Riveted Joints
Free with a Super Tutor account
Free with a Super Tutor account
Exercises — Keys
Free with a Super Tutor account
Free with a Super Tutor account
Free with a Super Tutor account
16 more solved questions in Machine Drawing
They are free with a Super Tutor account, along with practice quizzes and flashcards for this chapter. Free to start, no card needed.
Frequently Asked Questions
What are the important topics in Machine Drawing for CBSE Class 12 Engineering Graphics?
Are these NCERT Solutions for Machine Drawing free?
Sources & Official References
- NCERT Official — ncert.nic.in
- CBSE Academic — cbseacademic.nic.in
- CBSE Official — cbse.gov.in
- National Education Policy 2020 — education.gov.in
Content is aligned to the official syllabus. Refer to the board website for the latest curriculum.
More resources for Machine Drawing
For serious students
Get the full Machine Drawing chapter — start free.
Quizzes, flashcards, an AI doubt solver and a study plan for CBSE Class 12 Engineering Graphics. Free to start, no card needed.